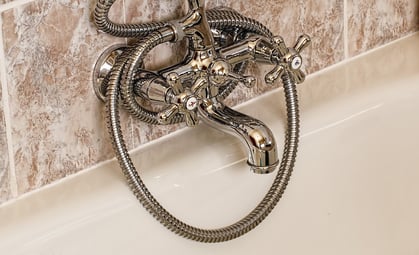
 Dripping tub faucet driving you crazy? Even if the incessant sound doesn’t keep you up at night, the constant drip can cause staining in your tub, plus waste water—up to 20 gallons a day!
Instead of letting that money go down the drain, take care of the problem right away. If you’re in the mood for a DIY project, grab your plumbing toolbox and get ready to do some work.
Shut off the water
First, we can’t emphasize this enough—turn off the water to your home before doing any repairs! You don’t want a minor drip to suddenly turn into a gushing mess that can ruin your floors.
Once the water is off, go into the bathroom and turn the faucet handles to the on position. This will allow any water still in the pipes to drain out.
Disassemble the faucet
Now some “exploratory surgery” is in order. Let’s start with the control handles, since this is where most problems originate.
If you’ve got separate hot and cold water controls, you may be able to determine which one is the source of the problem based on the temperature of the leaking water.
First you’ll need to remove the outer handle. If you don’t see a screw on the surface, there may be a decorative cap you’ll have to pry off first.
Carefully unscrew the outer part of the handle (did we mention you need to turn off your water first?) and remove it. Inspect the handle inside and out for damage or wear.
Once the handle is off, remove the part of the fixture that is flush with the wall. Now you should see a narrow piece of hardware called the cartridge or stem coming out of a hole in the wall. (It may be encased in a tube of metal, which also should be removed.)
The stem connects directly to the pipe and should be unscrewed and removed as well. The stem has multiple pieces inside that you probably will want to disassemble and inspect, too.
As you carefully remove pieces, making mental notes as to which order they need to go back in, check each part for damage. Are there rubber washers that are shrunken or damaged? Screws that have rusted? Seals that feel loose? This is likely the cause of your problem.
Head to the hardware store
Replacements for these pieces should be relatively easy to find at your local hardware store—though you may need an associate’s help to find the exact right parts. It’s vital that you get pieces that fit exactly if you want to avoid more leaks in the future.
You’ll also want to pick up a small tub of plumber’s silicone grease.
Reassemble the faucet with new parts
Replace the faulty parts with new ones, making sure everything is screwed together tightly and every part fits together solidly. (You don’t want to inadvertently create new places for water to seep through!) Plumber’s grease can make it easier to screw stiff pieces together.
Once you’re certain everything’s put back together properly and you’ve made sure you don’t have any screws or other pieces left over, turn your water back on and see if the problem is fixed.
When to call a professional
In many cases, simply repairing worn parts is all that you’ll need to do. However, if a minor leak continues (or if it becomes dramatically worse), you’ll need to hire a more experienced professional with specialized tools and an eye for other potential causes.
If you’re looking for a plumber in the Upstate area, Ken’s Plumbing is available 24 hours a day, 7 days a week—so if you finish your repair job at midnight on Saturday only to find out the problem is even worse, we’ve got your back!
Give us a call at (864) 242-5511 or schedule service online.

.png)