 TV commercials make cleaning your home look so easy, don’t they? Just spritz on this magic formula, and in seconds your bathroom is sparkling clean! If only.
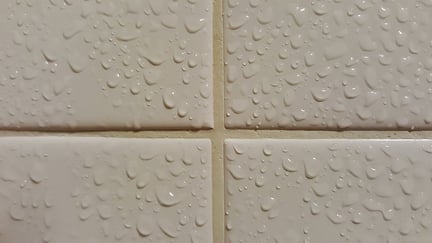
One of the hardest things to clean in a bathroom is tile—specifically, the grout in between tiles. Grout stains relatively easy and it’s porous, meaning it’s easy for dirt and other gunk to get trapped deep down inside.
In a warm, humid environment, grout can also become a harbor for mold and bacteria. Good thing our showers are warm and humid environments!
Cleaning your bathroom tiles, particularly those in your shower, is important so you can avoid the health issues associated with biofilm and mold growth.
Unfortunately, the wrong cleaning process can actually cause more problems. Acid-based cleaners can actually weaken or dissolve the grout, allowing water to leak behind the tiles. This can cause a host of issues, from mold growing where you can’t see it, to actually creating leaks that can stain your downstairs ceiling—and worse.
To avoid major issues with tile grout, here are our recommended ways of keeping your shower tiles clean:
Preventing shower tile issues
Of course, you’ll always have to clean your tiles—there’s no way to get around that. But there are some preventative measures that can make the job easier for you.
- Seal your grout. First, you’ll want to seal the grout in order to block mildew and debris from penetrating the surface. Grout sealers can be found at most home improvement stores, and are available in spray and roll-on varieties. Be sure to follow the package instructions carefully.
- Ventilate. After your shower, be sure to run your bathroom fan, and open the bathroom door if possible. Mold thrives in a humid environment, so be sure to let your bathroom air out.
- Wipe your tiles down. Get into the habit of wiping down your tiles after every shower, using a towel or a squeegee. Removing the excess water from the surface of the tiles will prevent at least some of it from soaking into the grout.
Using commercial cleaning products for grout
There’s no shortage of products designed to clean your shower. Just be sure that the cleaners are designed for grout and do not contain acids such as vinegar or citric acid. These can eat away at grout and cause more problems than you started with!
Also be aware that just because something’s sold in a supermarket doesn’t mean it can’t cause problems. (We’re looking at you, Drano!) Commercially available cleaning products often release irritating fumes that may cause headaches or respiratory problems for your family members. Be sure the bathroom is well-ventilated while you clean, or try a natural cleaner instead.
A safety note—NEVER MIX cleaning products together, and don’t use them in quick succession. Certain chemicals (namely chlorine bleach and ammonia, or oxygenated bleach/hydrogen peroxide and vinegar) react violently with one another and create toxic fumes or caustic acids. Pick one cleaner and stick with it!
Using DIY natural cleaners for grout
 There are several advantages to using natural cleaning solutions—they’re better for your health because they don’t include mystery chemicals, they can help protect the environment, and in most cases they’re cheaper than commercial products. The down side is that they sometimes take a little more work (though commercial cleaners aren’t effort-free either).
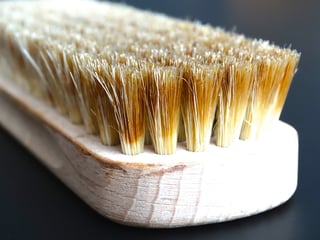
In most cases you’ll want to get a nylon-bristled scrubbing brush (a toothbrush isn’t likely to give you the power you need). Get ready to apply some elbow grease to get that grout looking like new!
Here are some natural grout cleaning alternatives:
- Hot water and a good scrubbing: Sometimes this is the best way to get some of the stains up. Use your nylon brush and maybe a bit of dish soap if needed.
- Baking soda and water: Add enough water to the soda to make a paste. Apply to particularly tough stains and let sit overnight, then rinse with hot water.
- Baking soda and hydrogen peroxide: Mix ¾ cup baking soda with ¼ cup hydrogen peroxide, and add a squirt of dish soap. Use your nylon brush to scrub the solution onto the grout. After a few minutes, rinse it off with hot water.
- Oxygenated bleach: This is non-toxic bleach available in many stores. Mix with water (NEVER with vinegar) according to package directions and scrub onto the grout. After five minutes, scrub it off and rinse with hot water.
Again, don’t use vinegar, lemon juice, or any other acid on your grout!
And as with any product, be sure to test it out on an inconspicuous area first to make sure it doesn’t stain or discolor.
Ready to throw in the towel?
Grout is not easy to clean, and will take some effort to get right. But there are a few cases where you might be ready to call in a professional, including:
- Your tiles are already leaking and causing issues
- Your tiles are old and need to be re-grouted or replaced
- You’re ready to call it quits on tile and remodel your bathroom all together!
If you’re in the Greenville, SC area, a bathroom expert from Ken’s Plumbing can assess your shower tile issues and help you find the best solution. We can even advise on your best choices for remodeling—give us a call and we’ll be happy to help you!

.png)